Ceramic Tiles


Ceramic Tile Center Los Angeles
I. General Information
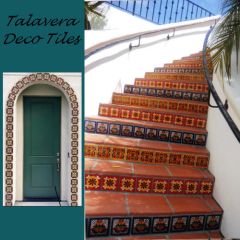
Ceramic floor tile has been a valued building material for many centuries, and remains a favorite today. It offers durability, ease of maintenance and long lasting beauty.
There is no limit to the variety of types, patterns, styles, and colors of ceramic floor tile. The texture of the surface may range from ultra-smooth to coarse or even sculptured.
Ceramic floor tile sizes range from tiny mosaics to 12"x 12" or larger. The shapes vary from traditional squares to rectangles, hexagons and octagons.
A chief advantage of ceramic floor tile is its durability. It withstands scuffing and is popular on countertop installations. It cleans easily and is even fireproof, which makes it suitable on surfaces near fireplaces and wood stoves. Since it is a traditional, classic material, ceramic floor tile fits into any decorating style or period, whether it is Early American, French Provincial, Oriental or Contemporary.
Ceramic tile is a man-made or machine-made clay or a mixture of organic materials and colorants that are fused together at high temperature (kiln firing) into a hard brick like or porcelain sub-stance. The common types are mosaic and quarry. Made in many shapes and sizes. The face may be glazed or unglazed. Sometimes coated with a thin film of vitreous material called glazing. Terra Cotta is a form of unglazed tile.
Ceramic Tiles can be split into two groups, porcelain tiles and non-porcelain tiles. These non-porcelain tiles are frequently referred to as ceramic tiles by themselves, separate from porcelain tiles.
Ceramic Tiles or non-porcelain tiles are generally made from red or white clay fired in a kiln. They are usually finished with a durable glaze which carries the color and pattern. softer and easier to cut than porcelain, and usually carry a PEI 0 to 3 rating. Non-porcelain ceramic tiles are usually suitable for very light to moderate traffic and generally have a relatively high water absorption rating making them less frost resistant and they are more prone to wear and chipping than Porcelain Tiles.
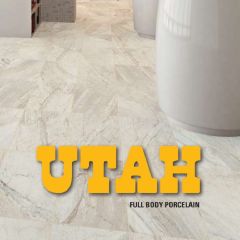
Porcelain Tile is a tile that is generally made by the dust pressed method from porcelain clays which result in a tile that is dense, impervious, fine grained and smooth, with a sharply formed face. Porcelain tiles usually have a much lower water absorption rate (less than 0.5%) than non-porcelain tiles making them frost resistant or frost-proof. Glazed Porcelain Tiles are much harder and more wear and damage resistant than non-porcelain ceramic tiles, making them suitable for any application from light traffic to the heaviest residential and light commercial traffic. Full body porcelain tiles carry the color and pattern through the entire thickness of the tile making them virtually impervious to wear and are suitable for any application from residential to the highest traffic commercial or industrial applications. Porcelain Tiles are available in matte, unglazed or a high polished finish.
A. Making the Right Choice:
1. Many ceramic floor tiles are designed for interior installations only, while other frost-proof tiles are suitable for both interior and exterior applications.
2. Ceramic floor tile may be installed in heavy traffic areas, including some commercial traffic areas, while others are limited to lighter traffic and non-commercial applications.
II. CONSTRUCTION
WEARLAYER (Bright Glaze, Crystalline, Satin, Matte)
STRUCTURE (Bisque)
BACKING (Honey0comb, Mesh Netting)
A. WEARLAYER
Glazed:
A glaze is applied to the bisque and fused to the body of the tile during the firing process.
Monocuttura:
The body and glaze are fired together in a single process which produces a stronger fusion and a more durable finish. Most of our current product line is manufactured this way.
Bicuttura:
The bisque (or body) of the tile is fired first; the glaze is then applied and the body and glaze are fired together.
Unglazed (referred to as quarry tile or paver):
No glaze is applied to the tile; the fired bisque becomes the finished product. Some products, including porcelain tiles are water polished to achieve a beautiful shine without glaze.
B. Structure
Bisque:
The bisque is primarily composed of clay, shale, stone particles and other minerals taken from the earth. The composition of a tile directly affects its density and strength and, therefore, will greatly influence its usage recommendation.
To keep it simple we will refer to two primary bisque contents: porcelain and white clay. Porcelain is the denser of the two.
Note: Commonly observed characteristics of ceramic structures include:
^ Bevelled Edges
^ Cushioned Edges
^ Sculptured or Wavy Edges
^ Undulated or Mottled Bisque
C. Backing
The backing of most ceramic tiles is comprised of molded bisque.
Honey-comb Backed:
Honey-comb backed tiles allow mortar to sink into crevices in the tile to better secure the tile during installation. There are a variety of backing configurations designed to secure the ceramic tile in the mortar bed.
Mosaic Tiles: (ceramic tiles on nylon or paper sheets) have an additional backing which is the sheet holding them in a uniform pattern during installation.
III. FEATURES AND BENEFITS
Features Benefits
1. Cushioned or Bevelled Edges Chip resistant on edges
2. Glazed Non-Porous Surface Easy to maintain
3. Inherent Shade Variations Natural and handcrafted look
4. Scalloped/Sculptured Edges Hides irregular grout lines
5. Durable wear surface Longer Life Expectancy thus Saves Money
6. Frost-Proof Patterns available Indoor/Outdoor use
7. Mesh Backed Mosaics Installs Faster thus saves time and money
8. Unglazed Tile Added slip resistance
A. Usage Recommendations
The usage recommendation for ceramic floor tile depends upon several important structural and wearlayer characteristics.
The criteria used to evaluate the strength, durability and practical uses of ceramic floor tile are:
^ Hardness factor of the glaze
^ Density
^ Compressive Strength (the ability to withstand pressure without fracturing)
^ Vitrosity or Porosity (the ability to remain impervious to moisture. Primarily to determine a ceramic floor tile's suitability for exterior uses or not)
^ Slip Resistance (some commercial applications specify the use of "non-skid" ceramic floor tile)
Below is a simplified coding system for the usage recommendations of ceramic floor tile:
(C) Suitable for commercial use
(LC) Suitable for low traffic (light) commercial use
(EH) Suitable for entire household use (all rooms-all traffic conditions
(LH) Suitable for light household use (not recommended for kitchens or entry-ways where traffic may be heavy)
V. SUITABLE SUBSURFACES
A. Concrete Surfaces
1. Make sure the surface is clean, smooth and dry.
2. Remove all dirt, grease, dust, wax and etc.
3. Remove any adhesive, paint and etc.
4. Make sure concrete is fully cured (28 days).
5. Check for presence of moisture and/or hydrostatic pressure.
B. Multiply Underlayment Panels and/or Plywood Surfaces
1. Multiply should be exterior grade underlayment.
2. Total thickness should be 1-1/4" or greater in at least two layers. The top layer of plywood should be 1/4" or greater with staggered joints.
3. Nail every 4" around the perimeter of sheets and every 4" throughout surface. Use only UNDERLAYMENT NAILS. Nails should be 1-1/4" in length.
4. Countersink all nails or screws.
C. Resilient
1. Ceramic floor tile may be installed over a resilient surface which is free from any urethane wearlayer, topically applied acrylic floor finishes or floor wax.
2. The surface must be intact. No loose areas.
3. The goods must be firmly bonded to the floor beneath.
4. The existing flooring must be un-cushioned.
5. The surface must be clean and free of dirt, grease, dust, or wax.
D. Cementitious Backer Board (Durock):
1. DUROCK BACKERBOARD is an outstanding substrate material that can be nailed using DUROCK NAILS or glued using the same setting material that will be used to install the tile.
2. Use 1-1/2" GALVANIZED DUROCK NAILS. Use a nailing pattern similar to that described under MULTIPLY UNDERLAYMENT.
3. Use DUROCK TAPE at all seams, skim-coating the seams with the tile setting material.
VI. NON-SUITABLE SUBSURFACES
Do not install ceramic tile over the following Subsurface:
^ Particleboard
^ Masonite (tempered or untempered)
^ Chipboard or Waferboard
^ Hardwood plank or parquet
^ Cushioned vinyl
^ Rubber flooring
^ Solid vinyl flooring
^ Urethane coated flooring
^ "Loose-laid" materials of any kind
VII. SURFACE PREPARATION
A. Clean
1. All subfloors or subsurfaces must be clean, level, dry and structurally sound.
2. Remove all dirt, grease, wax, dust and etc.
3. Scrape off any foreign material such as old adhesive paint using the FLOOR SCRAPER. Painted surfaces should be thoroughly sanded.
B. Patch
1. Fill all holes, cracks, countersunk nails and seams with LATEX PATCH. (For interior use only)
2. Make sure LATEX PATCH is completely dry and set before priming.
3. Use a 611 TAPE KNIFE to spread and smooth.
4. If filling in an area greater than 1/2" in depth, use multiple layers and allowing each layer to dry and set before applying the next.
C. Prime
1. Apply two coats of PRIMER if needed. Using a long handled paint roller with DISPOSABLE ROLLER COVERS, apply second coat perpendicularly to the first.
2. Allow primer to dry completely prior to applying second coat and dry prior to installing flooring.
VII. MARKING THE WORKING LINES
A. Proper Room Layout
1. Measure the width of each wall around the area to be tiled.
2. Then mark the center of each wall on the floor next to the wall. Stretch a chalk line between the center points of two facing walls, stretch it tight, then lift it and let it snap.
3. Follow the same procedure for the other two walls. Before snapping the second line, place a carpenter's square in the center where the two lines intersect. If necessary, adjust the second line so that the two lines intersect at a 90 degree angle.
4. For a room that is not rectangular, place the lines in the major areas of the room.
5. Lay loose tile from the center point along one line to the wall. If the space between the last tile and the wall is less than one-half tile, move the initial center line one-half tile closer to the opposite wall and snap a new line.
6. When laying ceramic tile in a diagonal format, first locate the 90 degree angle starting point. Then, mark four points on the working lines with each point four feet out from the intersection. Using a radius of four feet, mark diagonal guide points with a pencil tied to a string. The first guide point will be determined by the intersection of the arcs. Mark the second guide point. Snap a chalk line that joins the two points. This is the diagonal pattern line, which will serve as the starting line.
VIII. SETTING THE TILE
A. Installing Ceramic Floor Tile
1. First verify that enough tiles are available to complete the project and that extras are available for future use.
2. Verify that shade variations are acceptable and make provision for the proper distribution of shade variances throughout the installed area.
3. Protect walls, fixtures, mouldings and etc. with masking tape or drop cloths.
4. Mix the Tile Setting Mortar (Thin-set mortar in most cases)
5. Use DISPOSABLE GLOVES to protect your hands from skin-irritating mortar.
6. Use KNEE PADS for added comfort.
7. FLOOR AND WALL ADHESIVE can only be applied to a maximum of a 1/4" v-notch height, for floor installations. It will not remain stable at the ET-TROWEL height needed to install ceramic floor tile.
Characteristics of Ceramic Floor and Wall Adhesive
^ Interior Installations
^ Vertical surfaces primarily (refer to label for horizontal use)
^ DO NOT USE WITH CERAMIC FLOOR TILE.
8. Hold the trowel at a 60 to 80 degree angle.
9. Spread only the amount of Mortar Set that can be covered in a 20 - 30 minute time period.
10. Set all whole tile first. Begin from the center working line, squaring the first tile to the intersecting working lines. Careful accurate placement of the first tile is critical to the success of the project.
11. Set the tile in a pyramid fashion working away from the intersecting lines. This will help to insure the squareness of the project.
12. Set the tile in place with a gentle twisting motion. NEVER SLIDE TILES into place as this will "bulldose" mortar and leave an inadequate amount under the tile while squeezing excess mortar between tiles.
13. Exert strong downward pressure on the tile, forcing it to bed securely in the mortar. The use of a GROUT FLOAT will make this easier.
14. Use TILE SPACERS to accurately space tiles. Use them vertically or take them out as you go along. It is not recommended to leave spacers under grout. A 3/16" - 1/4" grout space is recommended for most ceramic floor tile.
15. Remove excess mortar from tile with warm water. DO NOT ALLOW MORTAR TO DRY ON TILE AS IT WILL BE DIFFICULT OR IMPOSSIBLE TO REMOVE LATER. It is important to have more than one ORANGE SCRUB PAD, POLY SPONGE and DURA-SPONGE on hand.
16. After all full tiles have been set, cut and set the remaining tile and/or trim using the cutting tools.
X. GROUTING
A. Mixing the Grout
1. Pour enough grout into the container to complete the project or, if it's a large job, to cover a few square feet. Keep in mind that a huge bucket of grout could harden before the job is completed.
2. Depending on temperature and humidity conditions, add water (according to the instructions on the bag) to form a thick, "peanut-butter-like" consistency. If the bag doesn't specify how much water to add, use your own judgment. Don't worry about using too much water, because you can always add more grout to the mixture. After mixing, let the mixture stand or "slake" for about 10 minutes.
3. DISPOSABLE GLOVES are recommended to protect skin.
B. Applying the Grout
1. Apply the grout using the GROUT FLOAT. Spread grout over the tiles, forcing it into the spaces between the tiles. Use diagonal strokes over the tile to allow for fuller, smoother grout lines. Use pressure to force the grout deeply into the joints.
C. Removing Excess Grout
1. Wipe off excess grout by drawing the edge of the GROUT FLOAT diagonally across the tile. Hold the GROUT FLOAT at a high angle and "squeegee" the excess grout from the tile.
2. Wait approximately 15-20 minutes, then carefully sponge off excess grout with a POLY SPONGE and/or DURA SPONGE . Rinse sponge often. DO NOT ALLOW GROUT TO DRY BEFORE CLEANING OFF THE EXCESS.
3. After 2-3 hours wipe off the remaining grout film with an ORANGE SCRUB PAD and a dry cloth.
D. Dry Grout Process
This process is designed to be used with LATEX SANDED GROUT ONLY.
1. Combine SANDED LATEX GROUT(in the blue box or blue checkered bag) with LATEX ADDITIVE to form a thick, "peanut-butter-like" consistency.
2. Depending on temperature and humidity conditions, 1 qt. of LATEX ADDITIVE is usually required for approximately 12 lbs. of sanded grout. After mixing, let the mixture stand or "slake" for about 10 minutes.
3. To apply grout, follow the regular grouting process, working in approximate 3'x 4' sections.
4. With a damp sponge, wipe off any excessive grout film that remains. Wait approximately 10 minutes, then sprinkle several handfuls of dry powdered grout, from the sack, lightly over the grouted tile.
5. Using a terry cloth towel, vigorously buff the tile. Continue buffing until the surface of the tile is clean and joints are full and smooth. Shake cloth frequently to remove excess grout.
6. If grout appears ragged on the edges, wipe down with a medium damp sponge.
5. Lightly brush or sweep excess dry grout from the tile and dispose of promptly. Do not reuse.
XI. FINISHING THE INSTALLATION
A. Reseating Toilet
If applicable, reseat toilet using the TOILET BOLT AND SCREW SET and the WAX BOWL RING WITH FLANGE.
1. Apply the WAX BOWL RING, flange side down, wax side up, to the closest collar portion of the drain. Replace bolts and, if using a bolt style tank, drill holes for the front. Make sure all of the wax from the old seal is removed. Then, reseat the toilet. Connect the water supply line. When turning the water back on, check to make sure there are no plumbing leaks.
B. Applying Grout Sealer
1. After the grout has cured for at least 72 hours, caulking and sealing can be done. Seal the grout with GROUT SEALER applied with a sprayer attachment or manufacture's recommended method. Wait one hour between coats. Buff the tile with a clean cloth after each coat has been applied to remove any film and to restore the luster to the tile.
XII. MAINTENANCE OF CERAMIC TILE
Cleaning and maintaining ceramic tile is done with GROUT AND TILE CLEANER. Reseal the grout using GROUT SEALER few times a year, as needed.
XIII. TILE PER S/F CONVERSIONS
One of our responsibilities while servicing our customers is to properly calculate the necessary quantities of materials needed to complete a given project. An ability to master these calculations, will certainly add credibility to our interaction with each customer.
A. Basic Formula
1. There are 144 sq. inches per sq. foot. Determine sq. inches by multiplying width x length in inches. (12 x 12 = 144) Divide the sq. inches of your tile into 144 = the number of tile needed per sf.
Example: 8x8= 64 sq. inches
144 divided by 64 = 2.25 2.25 tiles per sf. needed
Tile Size (per inch) Number of Tiles needed (per square foot)
4-1/4 x 4-1/4 = 8.00 Tile/SF.
6 x 6 = 4.00 Tile/SF.
8 x 8 = 2.25 Tile/SF.
9 x 9 = 1.78 Tile/SF.
9-5/8 x 9-5/8 = 1.56 Tile/SF.
10 x 10 = 1.44 Tile/SF.
12 x 12 = 1.00 Tile/SF.
13 x 13 = 0.85 Tile/SF.
Note:
*The figures above represent calculations based on true dimensions in tiles. Because an 8 x 8 tile may actually be 7-7/8 x 7-7/8, additional tiles may be needed.
*Add 10% to the quantity needed.
*It is suggested you purchase up to the nearest full container. If loose pieces are available, always sell those first.